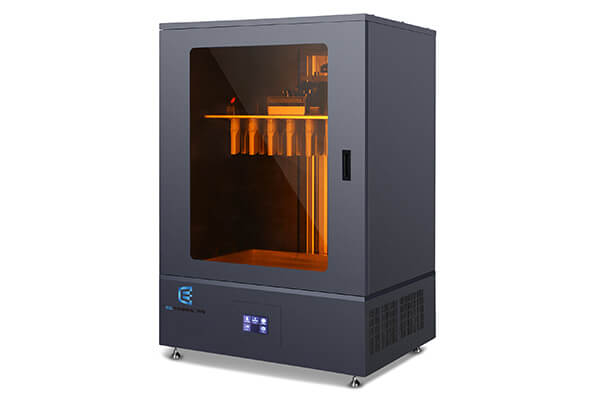
Jewelry 3D Printer
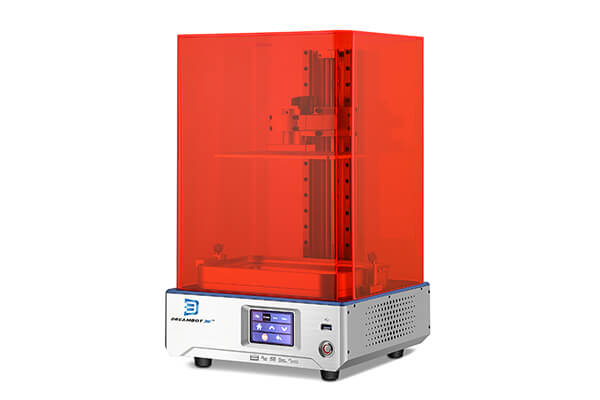
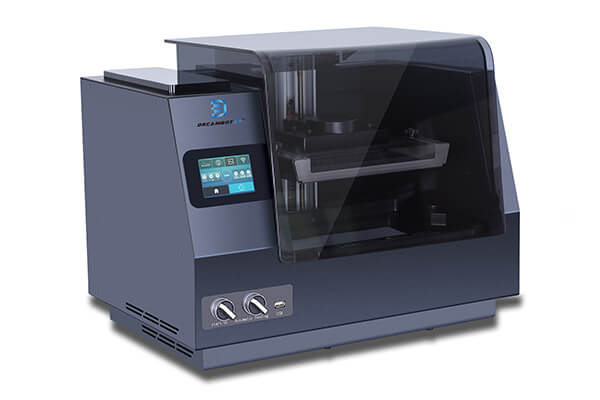
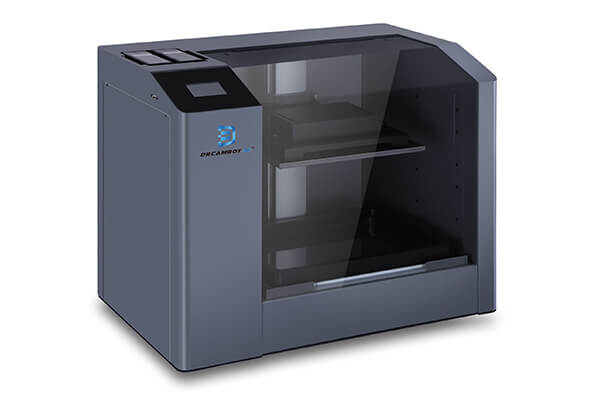
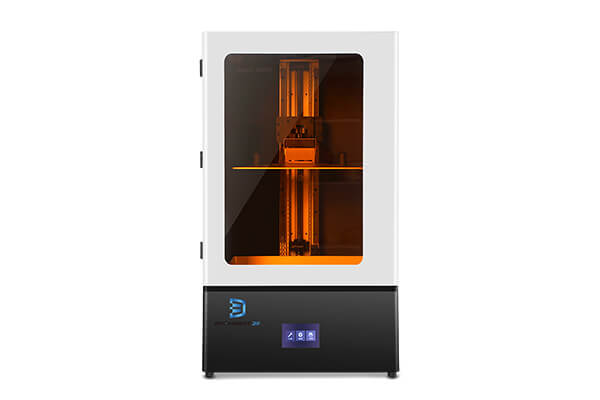
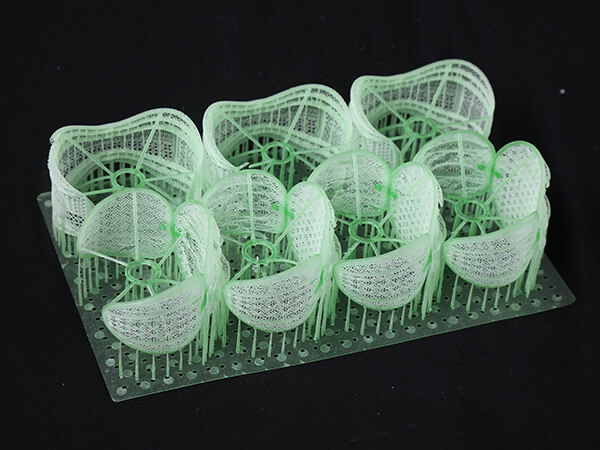
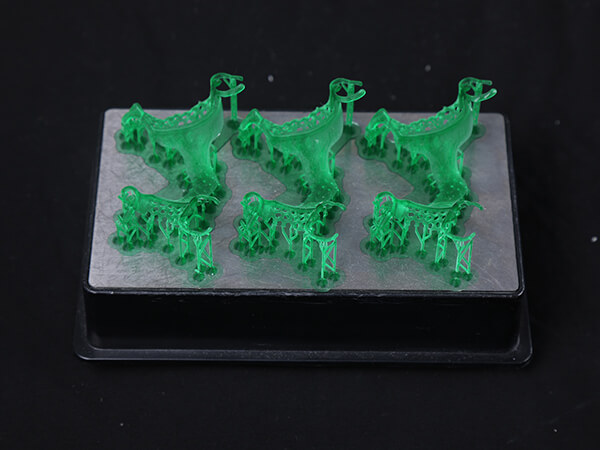
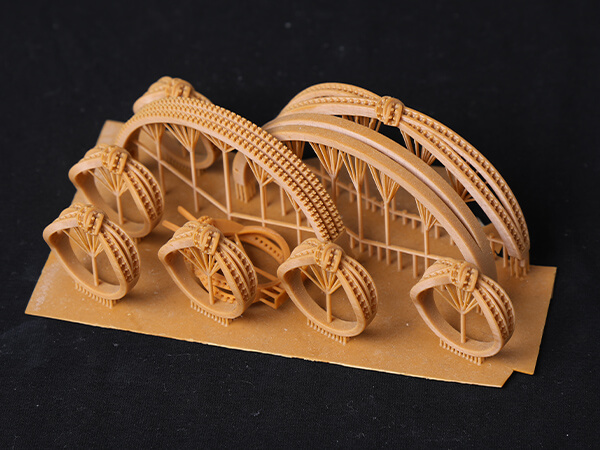
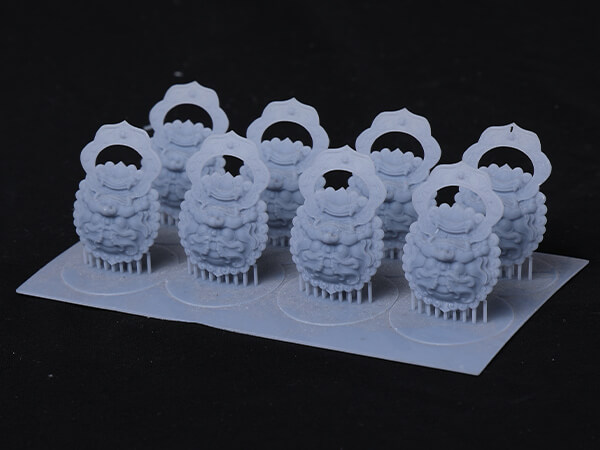
The jewelry 3D printer is used for creating different wax models of jewelry before casting. The jewelry 3D printer is used in the jewelry making industry to print jewelry molds for massive jewelry making.
How 3D printers work for Jewelry Making
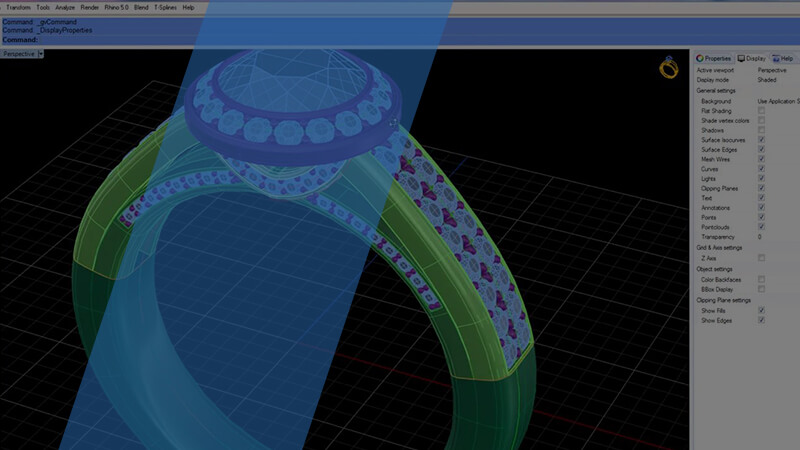
3D design
jewelry
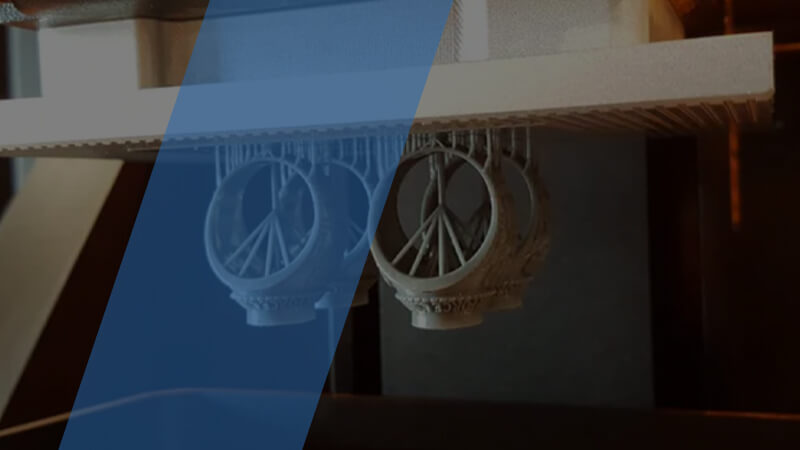
3D Printing
jewelry
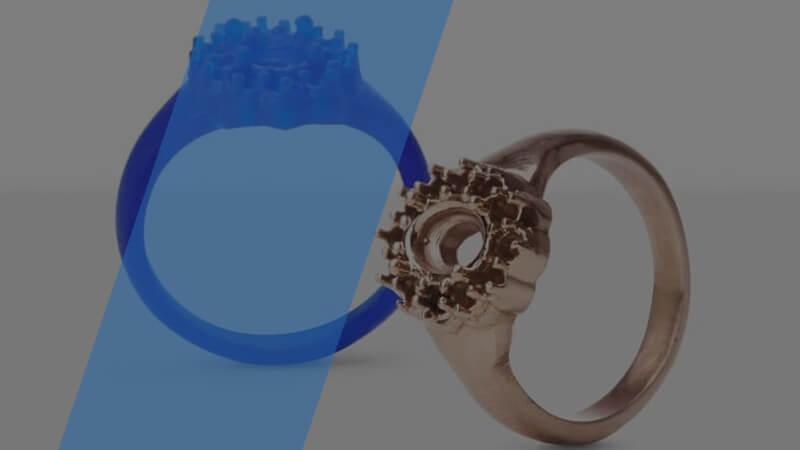
casting
jewelry
Jewelry 3D printing has revolutionized how jewelry is made. Uniqueness, precision and attention to detail are the key aspects of quality jewelry.
Jewelry 3D printer allows you to make large batches of jewelry pieces at once. Therefore shortening the manufacturing process unlike the traditional process that takes a longer time.
With our jewelry 3D printer you can print high detailed and custom made jewelry pieces.
You can create different models of jewelry in CAD and later export the model for printing with your jewelry 3D printer. Therefore giving you the opportunity for personalization.
The jewelry 3D printer allows you to create complex designs on your jewelry using designing software which is more difficult with traditional methods.
You can print your 3D models with castable resins which is easy to get. The cost of jewelry 3D printer and castable resin are affordable.
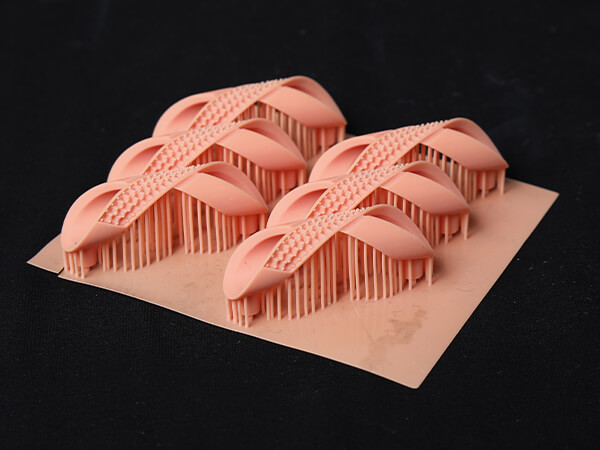
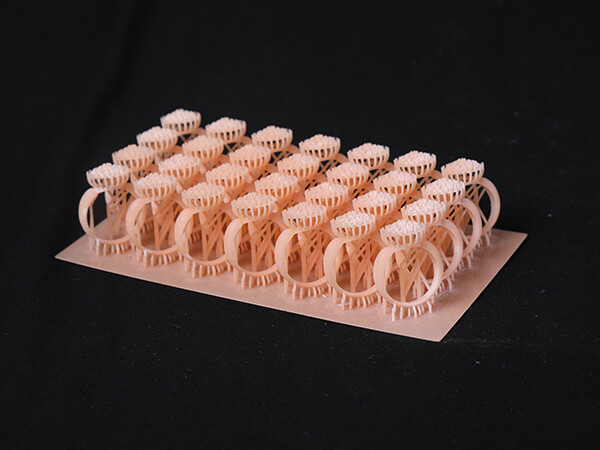
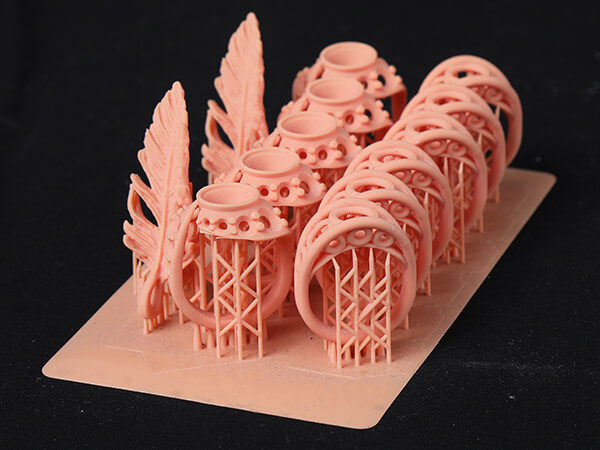
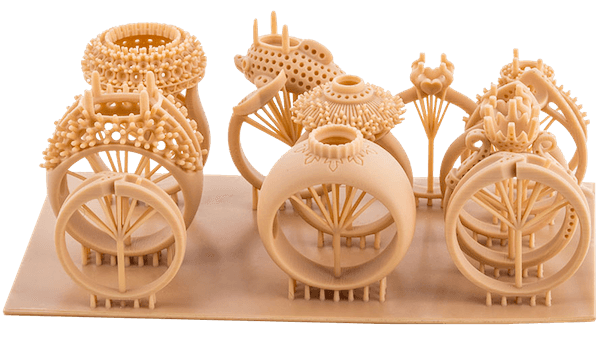
Don't know how to choose a model?
Are you confused about how to choose the correct model and type of 3d printer? We support 24/7.
4 points why choose us
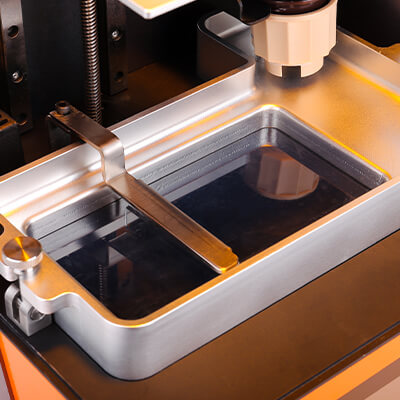
4K resolution printing
4K black-white industrial screen, 0.01-0.05mm layer thickness accuracy, more accurate printing of details.
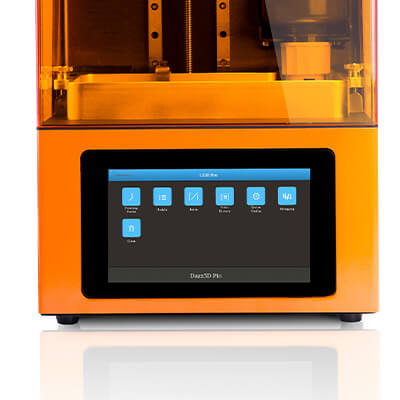
PLC control system
All 3d printers are equipped with PLC control system as standard, makes the operation more convenient, and reduces the error.
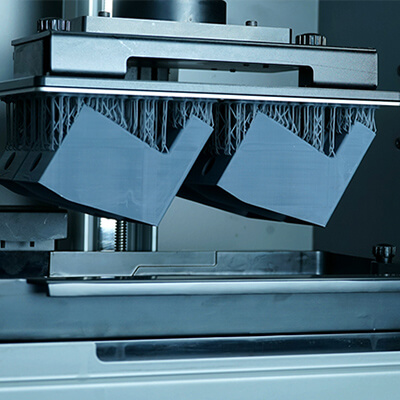
Extremely speed printing
Large printing size, 20mm/h printing speed, complete your printing tasks faster.
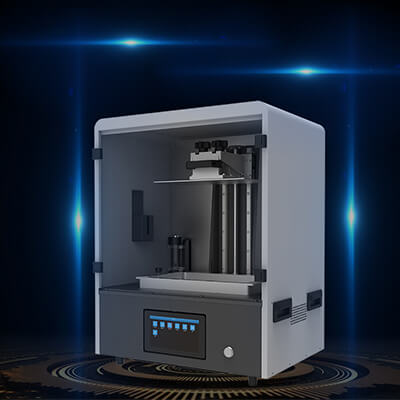
Reinforced structure
The all-metal one-piece shell reduces resonance, makes printing more stable and improves printing accuracy.
What our customers say
How 3D Printers are Used in the Jewelry Production Industry
Jewelry 3D Printer Buying Guide
1.1, What’s the Original Production Process of Jewelry?
1.2, What Processes Can 3D Printers Replace?
1.3, What’re the Changes After the Intervention of 3D Printers?
2.1, Introduction to the Working Principle and Development History of 3D Printers
2.2, Analysis of the Advantages of Using 3D Printing in the Jewelry Production Industry
Every modern-day jewelry printing line makes use of 3D printers. From the design process to scalability for mass production, jewelry 3D printers serve as the most viable machines. Unlike in most other industries, it’s impossible for professionals and hobbyists dealing in the design and manufacturing of jewelry to enjoy a smooth and efficient production process without the aid of a 3D printer.
Dreambot3D is a jewelry 3D printer manufacturing company looking to provide a one-stop digital solution to every jeweler around the globe. To help you better understand the durability, proficiency and efficacy you enjoy from having the best 3D printer in your jewelry printing line, we optimized this buying guide to provide detailed info on all things jewelry 3D printers, their viability in the jewelry casting industry and the buying process.
The Impact and Changes of 3D Printers on the Jewelry Production Industry
Two techniques have historically defined jewelry making: handcrafting and lost-wax casting. Both techniques require significant technical expertise, are highly time-intensive, and mistakes in the process can prove expensive.
But today, digital design and 3D printing are primed to disrupt these age-old practices in a major way. Supplementing traditional processes with jewelry 3D printers brings new possibilities in design and production to jewelers, as well as exciting new customization options for customers.
Let’s take a look at how 3D printers have demystified the way hobbyists and professional jewelers think design and manufacturing of jewelry.
1.1, What’s the Original Production Process of Jewelry?
Before jewelry 3D printers took over the industry, jewelers and artisanal craftsmen made prototypes by hand by painstakingly carving details into a solid wax block. Amongst all the jewelry casting methods widely used by most artisans, lost wax casting stands out.
Lost wax casting is a very old technique and has been used even before 3D printers came into the picture. Through this technique, a mold can be created from a prototype that was made using wax. For traditional jewelry makers, lost wax casting is a highly useful method for producing a high volume of custom pieces. It is especially suitable for replicating very detailed designs quickly and accurately.
In lost wax casting, a mold is built about an initial prototype made of wax. Lost-wax casting involves a process in which molten metal is poured into a mold that has been created by means of a wax model. Once the mold is made, the wax model is melted and drained away. A hollow core can be affected by the introduction of a heat-proof core that prevents the molten metal from totally filling the mold.
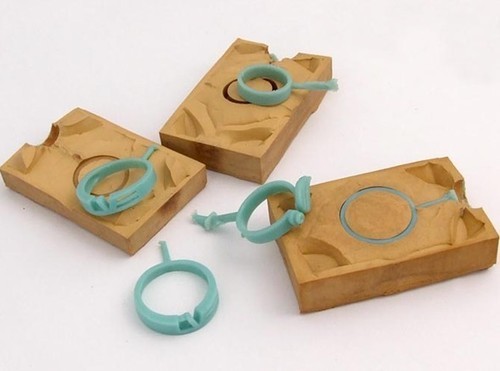
Common on every continent except Australia, the lost-wax method dates from the 3rd millennium BC and has sustained few changes since then.
To cast jewelry with gold, a mold is made from the model, and the inside of this negative mold is brushed with melted wax to the desired thickness of the final gold. After removal of the mold, the resultant wax shell is filled with a heat-resistant mixture. Wax tubes, which provide ducts for pouring gold during casting and vents for the noxious gases produced in the process, are fitted to the outside of the wax shell, which may be modeled or adjusted by the artist.
Metal pins are hammered through the shell into the core to secure it.
Next, the prepared wax shell is completely covered in layers of heat-resistant plaster, and the whole is inverted and placed in an oven. During heating, the plaster dries, and the wax runs out through the ducts created by the wax tubes. The plaster mold is then packed in sand, and molten gold is poured through the ducts, filling the space left by the wax. When cool, the outer plaster and core are removed, and the jewelry may receive finishing touches.
1.2, What Processes Can 3D Printers Replace?
There are many misconceptions about the use of 3D printing for jewelry. One thing can be said for sure – this technology has changed the rules of the game for everyone who has anything to do with this industry. It’s true that jewelry 3D printers come with lots of advantages. But before we dive into how influential these advantages can be to your production line, it’s important you obtain a basic understanding of the production processes jewelry 3D printers are optimized to replace.
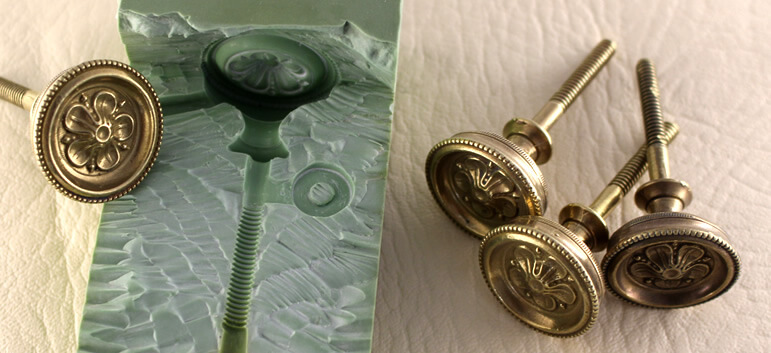
Prototyping: the introduction of jewelry 3D printers in the lost wax casting process replaced the need for a handmade jewelry design or prototype. 3D printing technology has made it easier and faster to create a wax prototype. There are now several castable resins that can be used with LCD printers and can be polished before being used to create molds.
Design: accuracy and scalability in the jewelry design and creation process hindered growth for years. Traditional methods of designing prototypes do not leave much room for repeatability, scalability or accuracy. Jewelry 3D printers are solely dependent on CAD designs flexible enough to allow artisans and jewelers to streamline an editable, scalable, repeatable and accurate design process.
Wax Model Printing Process: 3D printers that are capable of making a model directly with a castable material like wax are extremely popular amongst jewelers. Making such intermediate models can save time and money by shortening the technological process. Thus, one needs less time for the finished product. Sometimes, the item can be so complicated that making a press form an intermediate model is impossible. In such cases, only jewelry 3D printers can help.
1.3, What’re the Changes After the Intervention of 3D Printers?
3D printing is the mechanized process of creating an object by adding thin layers of material one on top of another. 3D printing may be applied to a large range of industries, including jewelry. For designers, the possibilities are vast, allowing complex pieces such as invisible set rings or pendants with surrealist geometry to be made in hours when making them by hand may take days.
Since its intervention of jewelry 3D printers, artisans, jewelers, hobbyists, and the industry as a whole have experienced massive change in design, production and manufacturing. From how jewelry 3D printers are affecting an individual’s looking to obtain a beautiful piece of jewelry to its impact on retailers, we covered it all.

Retail Re-emerging: According to a recent selected survey by National Jeweler, retailers are embracing the growth in custom work because it offers “better margins, relationship building, and the fact that making a piece highlights what it is that makes jewelers, well, jewelers—the ability to make jewelry.” Many see custom as the gateway to future success, as satisfied clients will return to the same stores and designers with repeat business they can’t source from anywhere else.
It’s now possible to generate additional value by offering a 3D printed prototype. By allowing clients to check for overall comfort and fit, stone height, and even deciding between different stone sizes and shapes, retailers can sell unique jewelry that differentiates them from competitors. Loose gems in specialty cuts or sizes, specialty items such as wraparound bands to perfectly fit against unusually-shaped rings, and designs with an estate or family gemstones all benefit from a physical prototype for the customer to approve before the final decision is made.
Casting at Capacity: Casting houses are taking advantage of larger 3D printer build volumes and high precision to print full-capacity runs at faster speeds and lower costs than ever before. With reduced turnaround and operating costs—and almost no cost for maintenance—production becomes more efficient.
Many 3D printers have historically offered build volumes just barely large enough to fit a handful of rings at a time, but as 3D printing becomes more advanced, affordable models offer larger platforms. Jewelers can produce multiple versions of a single piece, create larger designs like cuffs and bangles, or embrace the repeatability of jewelry 3D printing and fill the platform with a production run of an entire line—more than 50 pieces at a time, in some cases.
A Tactile Buying Experience: In response to the demand for beautiful custom jewelry and superior consumer experience, designers use 3D printing to bring back the tactile experience of choosing a special piece.
Rather than gazing at a colorful computer render and hoping the final product fits like a dream, clients can now try on a prototype of a custom engagement ring they helped design to make sure it looks and feels exactly right before the final piece is produced. Unlike hand-carved waxes and some other wax-based printed materials, pieces printed in prototyping resin are both finely detailed and tough enough to resist breakage when handled by clients and staff. Adding this step to the process creates a more tangible experience that feels comfortable and interactive.
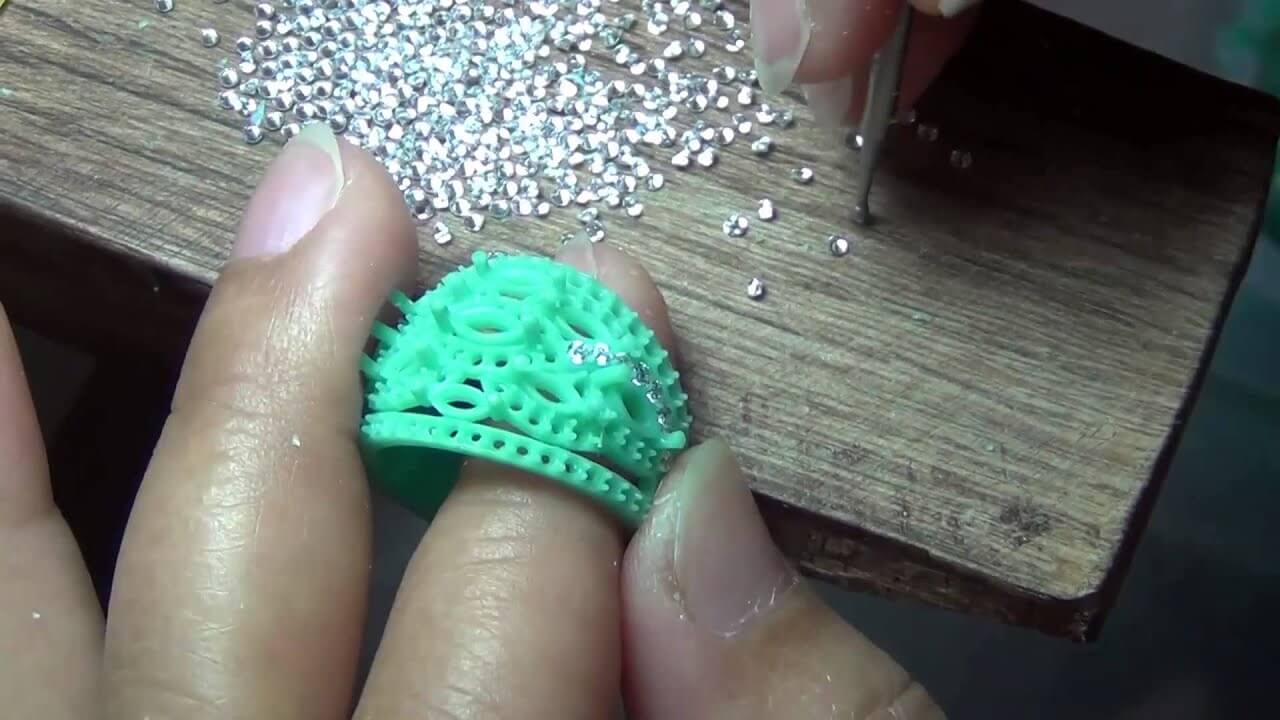
Research on the Advantage of 3D Printers Compared to Traditional Processes
3D printing in jewelry has a bright horizon. With the wider industry adoption of workflow techniques, the arrival of new generations of designers skilled in them, and the creation of new, more foolproof materials and hardware, we’re seeing the stage set for a major positive disruption. In comparison with the traditional processes of design and prototyping, jewelry 3D printers bring remarkable advantages to the table.
Design Freedom: jewelry 3D printers are changing the economics of the jewelry design market drastically. Independent designers are now able to bring their designs into the world without having to invest a lot of money first.
Do you have a good idea? Create a CAD file and have it printed directly. Service providers are already hitting the market that provides a full list of related services, ranging from mere production to quality assurance, packaging, branding, sales, and even processing and customer care.
The designer can now cherry-pick what suits his/her talents best – s/he might decide to control the whole process or simply focus on designing great products. Giving the designer a whole new avenue to explore, there are plenty of new objects to be discovered. Jewelry 3D printers enable shapes with undercuts, complex structures, and even directly functional parts.
Retaining Quality: Although jewelry 3D printers and CAD programs speed up the design and production process, there are still high levels of quality present in the production of jewelry. In fact, since these advancements cut costs in many areas, jewelry designers are free to spend more time and money on better materials and manufacturing. Furthermore, with a jewelry 3D printer, wax models are often better quality than hand-carved models due to the fact that the printer lays down each layer in an even and meticulous way. There is no danger of misshapen or imbalanced wax.
Waste Prevention: Another key advantage of using jewelry 3D printers over many traditional production processes is that it is incredibly resource-efficient. With a jewelry 3D printer, the only material that is consumed is what passes through the extruder of the printer, which is used for the actual assembly of the product.
Compare this to injection-molds, which often require the use of extra materials to fill the mold. Perforated sheet metal assembly processes will take a whole piece of sheet metal and cut holes into it, leaving the material that once filled each hole as scrap. Now, this scrap material is usually recycled, but it adds extra time and labor to the manufacturing process.
In many cases, jewelry 3D printer processes will produce less waste than traditional manufacturing would.
Additionally, manufacturers don’t have to produce as much of a given product to justify the setup costs, whereas the traditional supply chain relies on the efficiencies of mass production and requires a high volume of assembly workers. Jewelry 3D printers need little more than the necessary raw material to fulfill any one order and the necessary blueprint to produce it.
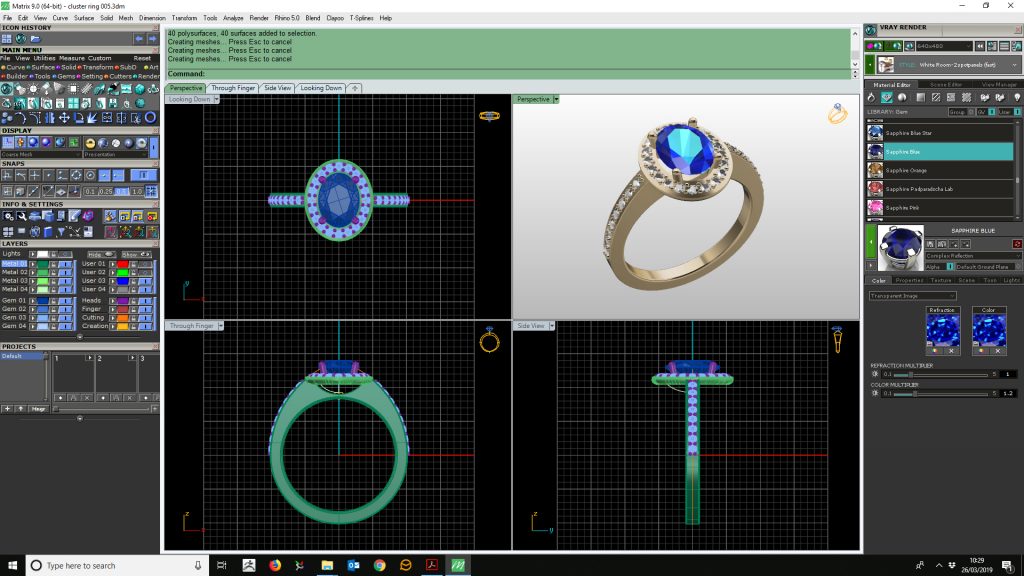
Tooling the Production Line: One of the biggest advantages that jewelry 3D printers have over traditional manufacturing is that the 3D printing process generally doesn’t require any special new tooling to make a part. When making a prototype, this can save a lot of time, money, and effort that would normally be spent on tooling the production line and getting an assembly process set up.
If the prototype reveals that the design needs rework, a new design can be programmed into the jewelry 3D printer and created relatively fast, while a traditional assembly line would require lots of time to retool the line just to churn out a small handful of prototype parts, which would be a waste of time, material, and labor.
So, when it comes to making a limited-run prototype of a part, 3D printing has a clear edge over the traditional method of tooling an entire production line.
2.1, Introduction to the Working Principle and Development History of 3D Printers
What’s almost 40 years old but looks brand new? Believe it or not, it’s 3D printing. Yep, additive manufacturing technology has been around since the Reagan era. At the time of invention in the 1980s, 3D printers focused on creating scale models using computer-aided design (CAD). The first patent for a 3D printer was issued to Charles Hull for “Apparatus for Production of Three-dimensional Objects by Stereolithography” in 1986. Hull went on to start the first 3D printing company, 3D Systems Corporation.
With this background in industrial manufacturing, most 3D printing technologies were protected by patents held by companies in the industrial market. As patents expired, 3D printers geared for the consumer began to appear.
3D Printing technologies have existed since the 1980s; however, it was not until the expiration of Stratasys’ patent in 2009 protecting their ownership of the fused deposition modeling (FDM) process that affordable consumer thermoplastic extrusion printers proliferated. The expiration of subsequent patents covering alternative additive manufacturing processes has further fuelled this growth.
2.1.1 Stereolithography SLA
SLA is a jewelry 3D printer that could be used to execute your projects that involve the 3D printing of items. Although this process is the earliest one in the history of 3D printing, it is still in use today.
The idea and application of this method are amazing. Whether you’re a mechanical engineer, who wants to confirm whether the part can fit your design or a creative individual who wishes to print a plastic prototype for a fresh upcoming project, Stereolithography 3D printing systems can truly bring your 3D models to life.
SLA jewelry 3D printers do not function like normal desktop printers that extrude some quantity of ink to the surface. SLA 3D printers operate with an excess of liquid plastic that, after a while, hardens and forms a solid object. Note that parts printed by stereolithography 3D printers usually have smooth surfaces, but their quality depends on the quality of the SLA printer used.
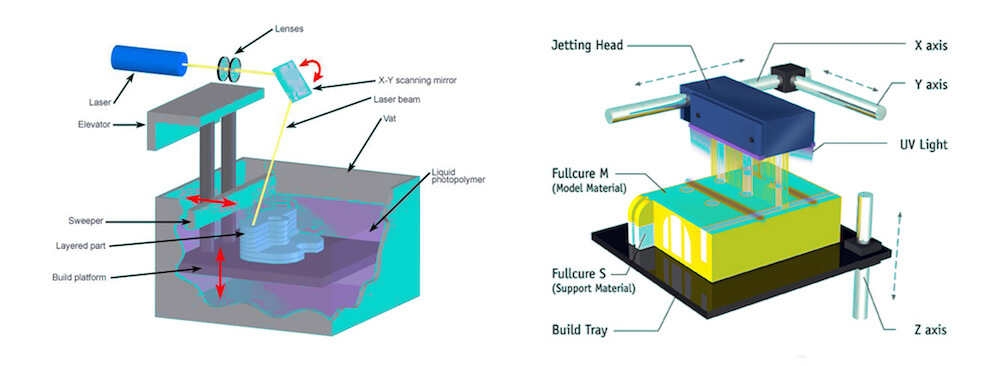
After the plastic hardens, a stage of the printer drops down in the tank a fraction of a millimeter and the laser forms another layer until printing is finished. After all, layers are printed, the item has to be rinsed using a solvent and then put in an ultraviolet oven to complete processing.
The time required to print an object depends upon the size of the SLA jewelry 3D printers use. Small items can be printed within 6-8 hours using a basic kid’s 3D printer, while large 3d prints can be several meters in 3 dimensions and printing time could be up to several days long.
2.1.2 Digital light processing {DLP}
DLP is another jewelry 3D Printer quite much like stereolithography. The DLP technology was made in 1987 by Larry Hornbeck of Texas Instruments and became well known for its use in the production of projectors.
It utilizes digital micromirrors laid out on a semiconductor chip. The technology is found in mobile phones, film projectors, and, of course, in 3D printing. For 3D printing, both DLP and SLA functions with photopolymers. However, the difference between SLA and DLP 3D printing systems is that DLA requires an additional source of lighting.
3D printing amateurs frequently use more traditional sources of lights like arc lamps for DLP printing. The other important piece of the DLP puzzle is an LCD (liquid crystal display) panel, which gets applied to the entire surface of the 3D printed layer during a single run of the DLP procedure. The substance used for printing is a liquid plastic resin that’s set in a transparent resin container. The resin hardens quickly when exposed to a lot of photons, or more simply put, bright light.
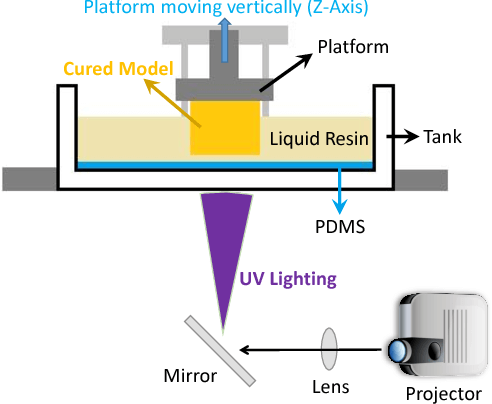
The printing speed for the DLP jewelry 3D printer is the kicker. A layer of hardened material can be produced with this kind of printer in a few seconds. After the layer is completed, it is transferred, and printing of the next layer is started.
2.1.3 Liquid Crystal Display {LCD}
Liquid crystal display printers or LCD printers as they are popularly known are jewelry 3D printers use to create 3D models or designs of numerous objects in education, automotive, aerospace, medicine, dentistry etc. LCD printers generate their light source through an array of UV LCDs. These printers are used to create 3D patterns or images of CAD models using materials such as resin, wax or metals. The images or 3D models obtained using LCD 3D printers are composed of dots.
LCD jewelry 3D printers display images by sending light from a metal-halide lamp through a prism or series of dichroic filters. This dichroic filter separates light into three polysilicon panels. In simple terms, a liquid 3D printer uses an array of UV LCD as its light source. The printer shines light directly from the flat LCD panel in a parallel fashion onto the build area.
As the light travels through the light source, the individual pixels open up to allow light to pass or close to block the light. This combination of open and closed pixels creates room for the liquid polymer 3D printer to produce multiple colors and shades on the projected image.

The light emitted from an LCD jewelry 3D printer isn’t expanded—that’s, it doesn’t spread beyond its projected frame. When using these 3D printers, you can design patterns and images of multiple variations; rest assured you wouldn’t experience pixel distortion halfway. Note that unlike most other resin printers, the LCD 3D printer print quality depends on its LCD density.
2.1.4 Comparison; Why LCD 3D Printer is Currently the Most Cost-Effective
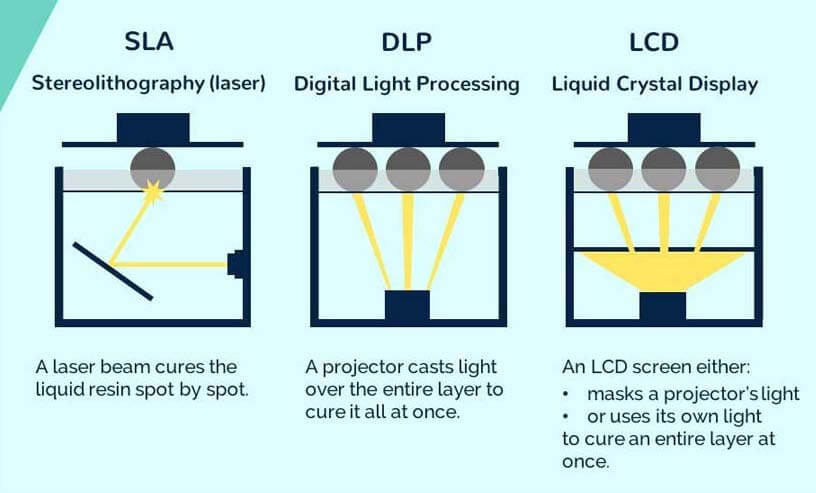
Cost: on a leveled scale, LCD jewelry 3d printers are regarded as a cheaper option than DLP and SLA. Just like SLA and LCD, DLP printers come in different sizes and shapes, but unlike the other two, the credibility of most DLP jewelry 3D printers is based on their gigantic nature, size or shape. SLA wax 3D printers, on the other hand, are quite outdated are not held in high regard by most professionals.
If you are looking for a cost-effective 3D resin printer, then the LCD jewelry 3D printer should be your preferred pick.
Resin Curing Method; DLP printers make use of projectors—quite sustainable but prone to leave distorted edges. SLA printers make use of a laser beam—not in any way durable due to the need to manually trace each layer of the laser. LCD jewelry 3D printers make use of LED lights—quite durable, not prone to distorted edges and do not require manual tracing.
Printing Speed: in terms of printing speed, LCD and DLP jewelry 3D printers are exceptionally fast. However, the same cannot be said for SLA.
Print Quality: in comparison with DLP and SLA, LCD jewelry 3D printers create models with a smoother and more accurate surface finish. LCD wax 3D printers should be your preferred pick if the print quality is of utmost importance.
Overall, LCD jewelry 3D printers are fully equipped to help you cater to your day to day printing needs while allowing you to enjoy the professional privileges you require to excel in the 21st-century market. For more information on the remarkable opportunities you get to enjoy from making an LCD jewelry 3D printer your preferred pick, ‘Get in Touch’ You can obtain a detailed overview of the product from our support team.
2.2, Analysis of the Advantages of Using 3D Printing in the Jewelry Production Industry
Using a jewelry 3D printer has its perks. If you say you fancy using a 3D printer to cater to your jewelry production line, it’s a common belief you have a tangible reason to back up such claims. To help you further understand how cost-efficient and time saving having a jewelry 3D printer in your production line can be, let’s have a detailed analysis of some of the perks you get to enjoy.
Shortening the Manufacturing Process
Using the traditional casting process, jewelry designers will hand-carve the original pattern in wax, followed by placing the wax pattern in a mold to be burned out. To create the cast piece, melted metals like gold and silver will pour into the mold cavity. Upon getting the cast piece, designers will polish the cast piece to the type of finishing of the end product.
Using a jewelry 3D printer, jewelry designers make use of CAD software to create their jewelry design digitally and 3D print their patterns using a 3D printer that can be used for casting to create the mold. The after process of creating the cast piece will be the same as the traditional casting process. The benefit of using 3D printing is the great time-reduction from the designing process to the pattern production phase.
Light Weight Design
The beauty of 3D printing is you can control how you would like your design to be printed out. You can print in 100% fill for a strong and heavier feel; if you want it to be lighter, you can try 80% fill or lesser, depending on the requirement. You can also design your jewelry with lattice structures.
Personalization Made Easy
With no minimum order of quantity, you can start offering bespoke personalize creations as part of your unique value add to your customers using digital tools for designing and 3D printing to either direct 3D printing them in plastic/metal or create the wax patterns for casting.
How to Choose a Machine and Assembly Your Jewelry 3D Printing Line
Starting a printing line for jewelry production isn’t in any way complex. All that’s needed is capital and dedication. Since we have detailed the buying process and activities involved in choosing the right jewelry 3D printer, you wouldn’t need to outsource much information to get your production line running at full speed.
But before we deviate entirely to getting you started and running at full speed, let’s look at the intricacies involved in picking the right jewelry 3D printer and assembling your printing line.
First things first, the reliability of every jewelry 3D printing line is largely dependent on the types of jewelry 3D printers available. 3D printing jewelry mold requires a jewelry printing machine that can create patterns and designs following crisp and detailed directives. Now to the big question, how do you find such printers;
- Know what you want to print:Before you buy a 3D printing machine for jewelry, it helps to know what you want to print. There’s a huge gap between 3D printing gadgets for your desk and industrial-scale production parts. Consider how often you plan to print, where you will use the printed objects, and how much time you’re willing to invest when printing.
- Identify your ideal 3D printer style:Many hobbyists use what’s known as a Liquid crystal display printer [LCD] for their jewelry printing task. These printers use vats of liquid resin to create 3D-printed objects. Other jewelry 3D printers that are widely used in jewelry printing lines include Digital Light Processing (DLP) and Stereolithography (SLA). It’s best you weigh the durability and efficiency of all the machines listed out to know which would be ideal for your printing line. You can use the information provided in the chapter to obtain clarity based on their usage and specifications.
- Look for safety features:custom 3D printer jewelry machines with safety features are generally well-designed. For example, an LCD printer might cool the nozzle and heated bed once a print job is complete. Some printers move the nozzle away from the object when you pause the job or the print finishes—preventing heat damage and excess resin from forming.
3.1, Which Machines are Needed and for what Purpose
With the factors listed above in mind, it’s time to be specific about the 3D wax printer for jewelry for sale you would like to buy. The basic machines needed to keep your jewelry printing production line running are 3D scanners and LCD 3D printers. Before we go into detail pertaining to these two machines, bear in mind that not only are LCD printers well optimized with formidable features that can keep your production line at optimal speed, but it is also regarded as the most affordable 3D printer for jewelry casting.
3.1.1 3D Scanner
3D scanning is the process of analyzing a real-world object or environment to collect data on its shape and possibly its appearance (e.g., color). The collected data can then be used to construct digital 3D models. A 3D scanner can take almost anything and digitize it. Using special software and a scanner, an object can be “captured” as a digital image by taking measurements from light bouncing off of the object.
Jewelers have the ability to capture and manipulate physical objects and bring them into the digital world. In many cases, it can eliminate the lengthy and costly mold making processes. Here are some of the perks you get to enjoy from having a 3D scanner in your jewelry production line:
- Create a piece of jewelry out of most any item
- Match an existing piece
- Reproduce priceless, irreplaceable heirlooms
- Digitally create organic pieces (Shells, fossils, twigs, food)
- Use 3D Scanning files to transform ordinary, non-traditional pieces
- CAD programs create 3D printable files ready for casting
- 3D Scanning workflow greatly reduces time, cost to replace parts
Since 3D laser scanning services can replicate just about anything, there is a lot that can be done with it for jewelry making. You could take a piece of fruit, a flower, or whatever you want and have it scanned. From there, a 3D printer could reproduce it using a specific material that you want. It could be plastic or metal.
3.1.2 LCD 3D Printer
When talking about the best 3D printer for jewelry casting, it’s impossible to make an accurate list without having LCD 3D printers ranking at the top. LCD jewelry 3D printers are more and more commonly used in jewelry casting due to their superior precision and speed. Instead of manually sculpting investment patterns in castable wax, modern jewelers usually start with a drawing and then, based on their drawing, they make a CAD design.
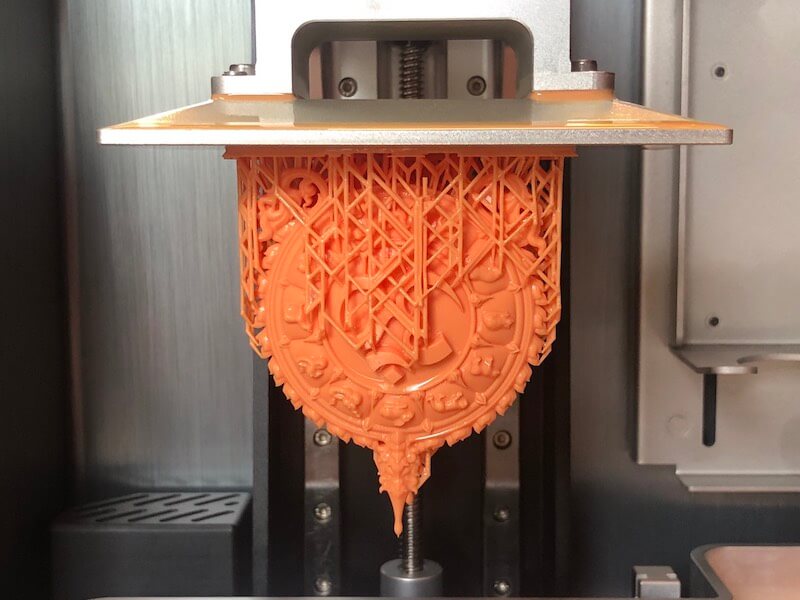
LCD 3D printers can also be used for casting wax models. And it is more efficient than the ancient hand carving method. In the course of functioning of an LCD jewelry 3D printer, wax-like resins are used as a printing material. Layer upon layer of wax is printed to urge the perfect model of an object or jewelry. These models are preferred by jewelry makers and manufacturers. LCD 3D printers have proved helpful in mass production. The increase in efficiency has resulted in a rise in output.
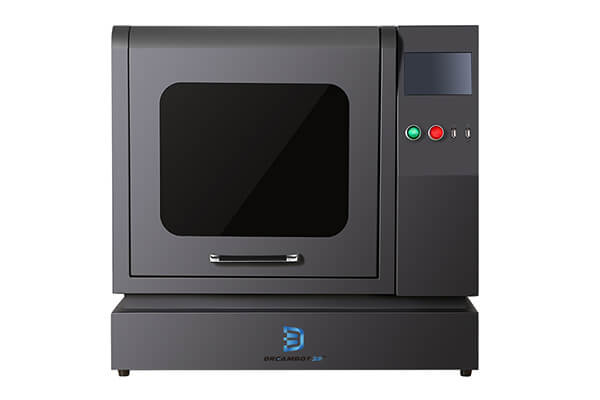
LCD jewelry 3D printers are the most cost-effective for starting any 3D printing jewelry business. The jewelry wax printer comes in various models and sizes and is suitable for all sorts of printing and designing tasks. With an LCD 3D printer for gold jewelry from a reputable manufacturer in your production line, you can enjoy 24 hours functionality all year long.
3.2, How to Choose the Most Important Part: 3D Printer
Productivity is directly proportional to the effort you put into making the right decision. If you want the best 3D printer for jewelry casting, you have to put maximum effort into the decision-making process. There are numerous variants of LCD jewelry 3D printers; some are quite expensive, while others are budget-friendly.
A lot of artisans and professional jewelers make the mistake of falling for the myth that the most expensive jewelry 3D printer is always best. Before you dive into conclusion as to which jewelry 3D printer would provide a more efficient and more accurate printing process, we recommend you consider the factors detailed below.
3.2.1 What is the size of the Print?
The size of the print says a lot about the type of jewelry 3D printer to buy. While most LCD Jewelry 3D printers can create CAD designs suitable for every printing task, you might want to keep in mind that you can sometimes come across machines with size, dimension or weight constraints.
Determining the size of a print requires in-depth knowledge of the customer base or audience you create 3D models for on a regular. If your day-to-day workload revolves around providing CAD designs and models of large print size to experts in numerous other industries, we recommend you thoroughly scout for a machine palatable enough to handle the dynamic needs of your customer base before finalizing the purchase.
Print size is one factor most individuals take for granted when purchasing a jewelry 3D printer. If you don’t carefully consider the dimension, weight or size of the model your jewelry 3D printer would be able to print before making payment, then keep in mind that the need to purchase another printer wouldn’t be far off.
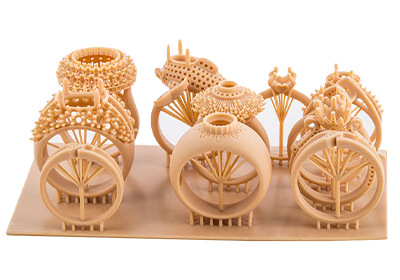
If it seems impossible for you to accurately pinpoint the size of the 3D models or patterns you would be subjected to creating on a regular, please put a call through to our support team; they are fully equipped to guide you through every step of the decision-making process.
3.2.2 Chose a Reliable Brand
Every smartphone or gadget lover would easily relate to how frustrating buying a device from an unverified or unreliable brand can be. Starting up a jewelry 3D printing company might not require a million-dollar investment—it’s amongst the few lucrative businesses that individuals from all walks of life can easily use to make earns meet.
Before we dive deep into what choosing a reliable brand entails, note that your printing line is only as viable or as functional as the type of 3D jewelry printers available. If your 3D printers are by-products of companies or manufacturers with little to no track record of providing sustainable jewelry 3D printers, it’s advisable you revisit the market as soon as possible and arm your production line with printers created by reputable brands.
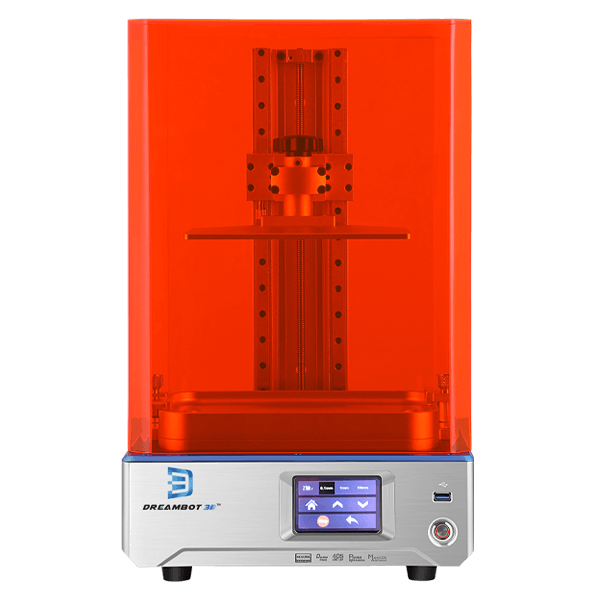
While it’s important you choose the right brand for your jewelry 3D printing need, the process involved can sometimes get confusing. To know if a 3D wax printer of choice is an ideal end product for individuals and manufacturers who would go the extra mile to ensure you enjoy the best printing experience possible, explore the following factors;
- For how long has the manufacturer you are about to purchase a 3D printer from been in business?
- What sort of customer feedback is backing up their brand’s identity?
- Are they regarded as a top brand by professionals and experts in the industry?
- How often do they provide jewelry 3D printers with a price tag in line with the productivity, efficiency and durability you require from the device?
3.2.3 Safety Configuration of the Machine
When purchasing or using a jewelry 3D printer, you must keep in mind that safety is paramount. And this is not just because you wouldn’t want to expose yourself to the toxic fumes most 3D printers emit during the design and creation process, but also because your ability to build a lucrative 3D printing business is largely dependent on how safe and ready-to-use your 3D printers are.
If this is the first time you are tasked with handling all the challenges that come with purchasing a jewelry printer, the safety configuration of the machine might seem alien to you. Don’t neglect the durability effect that comes with purchasing a jewelry 3D printer with safety configurations that does not reflect the productive ability of the machine.
When making your 3d printing machine buying decision, you need to be on the safe edge. The only way to achieve this feat is by putting due diligence into every step involved in the process. Note that the safety configuration of most jewelry 3D printers is quite complex and bulky. To demystify this tiring yet important process, consult with a support service representative before finalizing your buying decision.
3.2.4 Resolution Requirement of the Machine
How important is the resolution of a 3D printer to the end processor finish product? The answer to this question depends on the industry, client and customer base you are serving. Having a high-resolution jewelry 3D printer is quite essential for artisans and jewelers who design complex prototypes. A hobbyist can easily make do with jewelry printers of any type rest assured, the finished product and design are guaranteed.
There is no ideal benchmark or resolution requirement for jewelers or artisans looking to provide their clients with the best models and designs possible. However, having a jewelry 3D printer with high definition can help you attract, build and grow a formidable client base.
Before making a purchase, explore the resolution of the 3D printer. Try to be as detailed as possible. You can seek advice from experts and professionals with a reputable track record in the jewelry industry. Endeavor to have a basic idea or information on the 3D printer resolution requirements that would keep your production line running at an optimal level before actualizing your jewelry 3D printer purchase.
3.2.5 Consider Weather the Price of the Machine is Acceptable
It’s never a fun experience to have explored all the remarkable features and benefits a jewelry 3D printer is offering, weighed it with your production line and obtained satisfactory results just to find out during checkout that the jewelry 3D printer you want to purchase is far above your budget.
Jewelry 3D printers are quite expensive. They require a sizable investment, especially if you are looking for industrial-grade printers. As an artisan or jeweler looking to help individuals from different walks of life obtain the jewelry design or finish product they desire, having the best jewelry 3D printer is essential.
Before exploring all the features and benefits of a 3D printer, weigh its price range with your budget. Note that the price of a jewelry 3D printer does not determine efficiency. There are a lot of jewelry 3D printers with a high price but not as durable and efficient as counterparts with low price tags.
To hasten your 3D printer buying process in terms of price, it’s advisable you put a call through to a support representative backing up the activities of a brand of choice stating your estimated budget and the type of 3D printing activities you would like to carry out using the machine.
3.2.6 Consider the Suppliers After-sales Service Capability
While most of the decision-making process involved in buying a jewelry 3D printer we have listed thus far revolves around upfront features, benefits and price tags, you might want to bear in mind that there is more.
What’s the after-sales service of the brand you are purchasing a jewelry 3D printer from like? Is their support service trained to assist you during and after the sales? Do they take up complaints even after the deal is finalized? Is there room for free shipment or a money-back guarantee if the jewelry 3D printer shipped to you does not meet the required specification?
The after-sales service of your vendor or manufacturer goes a long way to determining how long your jewelry 3D printer would last. Many 3D printer manufacturers do not provide their users with sustainable after-sales service. Most brands tend to neglect complaints and don’t take into consideration customers feedback not in line with their sales and marketing goals.
Since its impossible to accurately determine how reliable a brand or supplier’s after-sales service is by asking the customer representative, the most viable method you can use to ascertain the quality of the brand’s after-sales service is by contacting individuals who have previously purchased Jewelry 3D printers from your chosen manufacturer.
3.2.7 Consider the Service Life of the Machine
Every jewelry 3D printer comes with designated service life. Most manufacturers state how long a machine would last base on the equipment and products that went into the design and development phase. To authenticate this claim, most jewelry 3D suppliers attribute a warrantee on their machine based on the service life.
Most 3D printing jewelry casting machines come with two years warranty. While this is the normal service life for most jewelry 3D printer, it shouldn’t come as a surprise if jewelry printers with six months or 1-year warrantee are thrown your way. In most cases, such printers are relatively cheaper and come with limited benefits and features.
It’s best you ask your supplier’s support representative about the warrantee policy backing up the machine you are about to purchase. Try as much as possible to weigh in on the same scale as your production line and the price tag attached. If the service life of the jewelry 3D printer doesn’t seem to one that can yield profitable returns within the estimated time, it’s best you abort the purchase.
3.2.8 Consider the Maintenance Cost of the Machine
It’s no news that without maintenance, even the strongest of machines would at some point fail. Maintenance isn’t a factor that’s to be considered after you must have finalized the buy; it’s a factor that should be considered as so as you come across a jewelry 3D printer capable of handling the dynamic printing task at hand.
Maintenance can become an expensive venture when proper consideration is not given to it during the buying process. You don’t have to weigh how much every part of the machine would cost, or the effect print fail would have on the machine in the long run. The basic maintenance culture needed to keep the jewelry 3D printer running effectively is all that’s needed.
Consider how much catering to the day-to-day needs of the machine would cost, weigh it against your budget and if possible, allocate a stipulated amount into maintenance. Note that creating a healthy maintenance culture during the buying process can help you heighten your jewelry 3D printer service life for a far longer time than your manufacturer or supplier proffered.
How to Choose Materials
The idea behind creating 3D prints for jewelry casting is centered on the type of materials available. When it comes to choosing materials, you want something that can reliably reproduce crisp settings, sharp prongs, smooth shanks, and fine surface detail without causing dents or leaving rough edges on your prints. LCD jewelry 3D printers are the most affordable 3D printer for jewelry casting.
In choosing materials for your LCD jewelry 3D printer, keep this notion in mind; the ability of a material to work in a traditional process is one of the most important features of a successful jewelry resin. Choosing the right resin mostly depends on the design of the jewelry piece you want to cast. The resin should be optimized for a particular jewelry-making style.
To endeavor you always pick the right resin material every time, keep the following considerations in mind;
- Melt flow
- Fillers like minerals and glass and how they affect performance
- Surface requirements
- Tensile strength, elongation and modulus
- Price, availability, moldability and colorability
- Regulations to comply with (ISO, FDA, RoHS, etc.)
- Global compliance requirements
Now in terms of jewelry casting, not all resins can effectively create formidable models for your jewelry casting needs, especially when making use of an LCD 3D printer. To save you the stress of scouring the internet for resins compatible enough to give you the finished product you desire, we have listed out the two main resin suitable for jewelry casting, their scalability and reliability.
4.1, High hardness resin
With the development of the 3D printing industry, the application field is increasing, and resin that can be applied to 3D printing is becoming more and more abundant.
At present, some industries that require high performance (such as high mechanical strength) are considering the use of photocuring 3D printing technology, but the performance of general resin materials is difficult to meet the conditions. Usually, durable models are critical in engineering and prototyping, and high impact and mechanical stress in engineering often leads to breakage or smash of 3D printed models. Therefore, special requirements for functional properties of resin materials, such as high strength, high toughness and impact resistance, have evolved.
The high-hardness resin has higher hardness and strength, which also has a very smooth surface. What you see is what you get. It can instantly transfer the designer’s inspiration into an object that you can see, which can provide a reference to the modification of design.
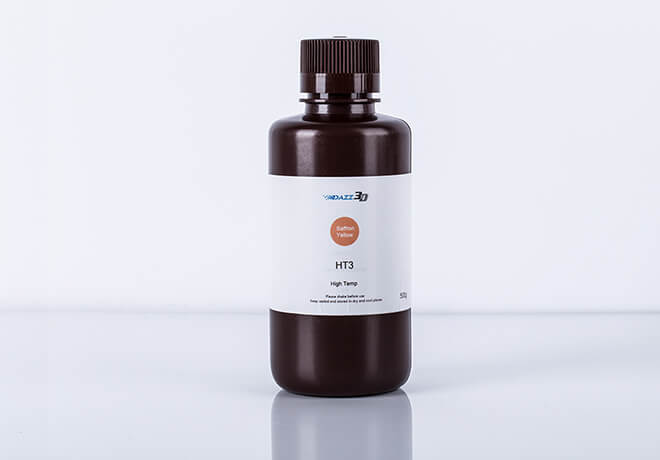
High-hardness resins can capture complicated details; you don’t need to worry that the feature is too small to print, which is an ideal choice for small holes and thin nails, and it can also create a challenging and unique model. It does not need polishing, the model printed by the machine has a smooth surface, and the perfect result can be realized with minimum polishing.
High-hardness resin has stronger mechanical properties than all conventional resins in the market. They have similar application fields and printing notices, and the performance difference is to meet the individual needs of different customers and industries.
Due to its excellent mechanical properties, it’s suitable for all kinds of models, housings and some engineering parts with rigid requirements, such as automotive, jewelry casting, electronic products, architectural models and other high-strength, high-hardness hand-made samples.
4.2, Castable resin
This is a very stable and reliable resin, which can be applied to all jewelry 3D printers and can also be applied to machines for other manufacturers. It can be used by the engineer, designer and jeweler to direct transfer the 3D design into a great jewelry product.
Castable resins can capture complicated details and has strong adaptability, which is an ideal choice to embed gem, and it can also create a challenging and unique model. Before casting, the model printed by the machine has a smooth surface, and the perfect result can be realized with minimum polishing.
Castable resins are photopolymers designed to be functional equivalents of wax. Heated to temperatures reaching well over 750°C, they burn out, leaving ash residue not exceeding 0.003% of the pattern’s mass.

In a jewelry casting process, investment patterns printed with such resins are covered with investment material, which typically consists of water and gypsum mixed in exactly the right proportions. A pattern covered with investment is called a flask, which is then put in the oven and heated to a certain temperature that the manufacturer recommends.
What matters most at this stage is the resin’s rate of thermal expansion; it should be kept as low as possible. Otherwise, an expanding resin could bloat out the investment and thus distort the desired dimensions of the model.
In the oven, a castable resin burns out in the investment and flows out of it, leaving space for target materials like gold or silver. Once the target material poured into the investment has cooled down enough to become solid, the surrounding gypsum is broken down to retrieve the casted jewelry piece.
4.3, ABS resin
This resin offers some unique features like a higher level of toughness and hardness. While producing an accurate printing size, the shrinkage level will be low. This is a perfect resin for creating a model manual, fixture production, small-batch parts production, and industrial design verification. This resin supports 395 to 405mm of applicable length. With up to 75mpa of bending strength, the resin shows up to 3. 835mpa of bending modulus.
4.4, High-temperature press film resin
It has a short curing time. The 3D model made of this resin can offer a super smooth surface. You won’t face any deformation issue while using it, and there would be a higher level of precision. That’s why it is widely used in the industries like dentistry, jewelry, glasses, toy design, handicraft, and more. The resin can sustain 200-degree C of hot temperature. It can produce around 70mpa of bending strength.
Conclusion
From how artisans, jewelers and hobbyists have had to navigate their way around a daunting design and manufacturing process to the invention and mainstream usage of jewelry 3D printers, we covered it all. We also talked about how you can easily obtain a jewelry printer of choice by providing a detailed guide to walk you through the process.
Without a doubt, setting up your jewelry production line in the most cost-effective way possible is of utmost priority to us. However, this is just the tip of the iceberg; that’s not all Dreambot3D is about.
Dreambot3D provides a one-stop solution for all things 3D printing. Our catalog is made up of printers and machines optimized to serve individuals in automotive, medicine, jewelry, R&D, technology, etc. Dreambot3D is mainly focused on the design, development, and distribution of industrial/commercial grade 3D printers for hobbyists and professionals in numerous industries.
If you are on the lookout for an affordable 3D printer for jewelry, we recommend you explore our catalog, or better still, put a call through today; our support representatives are ever ready to scale you through the process.
FAQ Guide
What is the Best 3D printer for Jewelry?
Jewelry making is not new. It is something that is popular across the globe for centuries. There have been various methods developed and followed in order to create ageless and beautiful pieces of jewelry. And, the most popular one is the 3D printing technology. It becomes very easy to create masterpieces using additive manufacturing technology. 3D printers help businesses print intuitive and difficult designs in a matter of time without a need for waiting too long. LCD 3D printers are the best 3D printers for jewelry. These 3D printers can be used for other applications too. However, these machines fit best when used for jewelry making. These build layer by layer and creates awesome designs without a need for several cumbersome steps involved with traditional methods.
How do Resin 3D printers work?
In the first instance, the roller of the printer spreads out a razor-thin layer of liquid polymer. Since this layer is liquid, it will spread out over the entire platform ensuring that each layer has a consistent thickness. The liquid polymer we use is UV sensitive. When struck by a computer-controlled UV laser, the resin will change from a liquid to solid state. Basically, the laser ‘draws’ the outlines of the print onto the resin layer and hardens the parts that it touches. The parts that are not touched by the laser will remain liquid. These two steps are repeated over and over and over again. The model is lowered by a fraction, and the roller spreads out a new layer. The laser then solidifies specific areas of that layer, which will become parts of your 3D print. This is repeated until the model is finished. Once the printing process is completed and the entire object has been printed, the print is raised out of the resin tank. The excess liquid will simply flow away and can be reused for other prints. The prints then need to be removed and finished manually (i.e. remove support structure, smoothen surfaces, spray-paint surfaces, etc.)
What wax is used for in lost wax casting?
Microcrystalline wax is pliable and slightly sticky. It is medium soft and has a smaller crystal structure than beeswax or paraffin. Derived from petroleum, this is one of the most common waxes used by lost wax casting jewelry sculptors.
Can you make jewelry with a 3D printer?
Yes you can make a piece of jewelry with a 3D printer. 3D printers can be used to create prototypes or models used to design and finalise the jewelry making process. When it comes to 3D printing jewelry, two main methods are used: Investment casting, which doesn’t differ too much from the traditional manufacturing method, and direct 3D printing, which throws caution to the wind and paves its own way. Investment is the most popular method to 3D print jewelry.
Can you make earrings with a 3D printer?
Yes, you can design an earring with a 3D printer. Designers use 3D printers to quickly create product models and prototypes, but they’re increasingly being used to make final products, as well. Among the items made with 3D printers are shoe designs, furniture, wax castings for making jewelry, tools, tripods, gift and novelty items, and toys.
How do you make earrings?
- The first thing that needs to be chosen is the base shape for your earring. You can use a circle to keep things simple. To start make a 2D sketch of your base shape in your 3D CAD program.
- To create the spiral shape we will be creating planes that are evenly spaced in height and making a drawing that moves the base shape to different locations. To get the spiral shape we need to draw several of these base shapes at different heights and then connect them to form a spiral strand.
- After you have drawn all the base shapes you will need to use the ‘Loft’ tool. It may be called something different in CAD programs other than Inventor, but it basically connects all the spaced base shapes you have drawn into one continuous strand.
- Next you will need to revolve the curved strand you have just made. You can do this most easily by using the ‘circle revolve’ tool. Click on the ‘Circular’ tool in the ‘Pattern’ section, then click on your strand. Now you will need to pick the axis to revolve it around, it should be the one that goes through your first and last layer.
- At the top of the earring you will need to make a small loop to attach your earring to. Find the plane that cuts your design in half, hot dog style and make it visible. You will need to convert your file type from your finished 3D drawing to STL (most likely this will work but some printers use other files). You can do this by going to save as and clicking ‘save copy as’ and then selecting STL as the file type when prompted.
- Next go to ‘Move’ and make sure it is on the build plate by clicking ‘Place on Build Plate’. You can also change the size of the object by going to ‘Scale’. Next you will need to click ‘Export’. Now you will need to get an earring kit from a craft store. They’re pretty cheap and have hooks and little rings.
Can you reuse 3D printer resin?
Fortunately, any leftover liquid resin in the resin vat can be safely reused. We advise against returning the unused resin to the cartridge or the original bottle to avoid contamination. Instead, just leave the unused resin in the vat with the printer cover intact.
How long does it take to 3D print a ring?
3D printing a ring can take anywhere from 30 minutes to 7 days or more. There are a several factors that dictate how long it takes to 3d print a part. These include the overall size and geometry of the part as well as the 3D printing technology being used.
How do you 3D print gold jewelry?
Wax 3D printing and lost wax casting are viable methods for 3D printing gold jewelry. When the plaster solidifies, it is put in an oven until the wax is completely burned off. The gold is then poured into the empty cast, thus creating a 3D printed gold item. In the final step of this process, the item is polished and finished manually.
Can 3D printers print wax?
Yes, 3D printers can print wax. You can print wax models using a few different 3D printing technologies. Professional 3D printing services generally use a type of material jetting, but wax-like models can also be made on a classic LCD 3D printer. When using a material jetting 3D printer, the wax is usually put in a tank where it’s heated. The wax is also available in a form of a resin, depending on the printer you use.
Can you use candle wax for lost wax casting?
Candle wax is not a very common material used in lost wax casting but its efficiency cannot be undermined. Yes, you can use candle wax for lost wax casting. It’s not ideal for hand modeling jewelry, but it can be used as an additive to other waxes to make them slightly harder.
How dangerous is resin 3D printing?
Standard resin for 3D printing isn’t rated eye or food-safe and can quickly cause permanent harm if exposed to these areas of your body. Leaving resins in the resin tank allows you the priviledge to reuse at a later time—Though a necessary step, it’s dangerous to leave objects in the light for too long because excessive exposure can cause prints to break down.
How do you cast jewelry in wax?
- Carve and Shape Wax: Carve your project in wax. Different types of wax can be used for your desired outcome. Sculpture wax is soft and can be shaped like clay, while some wax is harder and can be used to achieve textures in cast jewelry.
- Attach Sprues and Base: Attach sprues and weigh your wax model with the sprues attached. Melt wax onto the button of your flask base and attach your wax model to the base.
- Invest: Measure the ratio of investment powder to water based on the weight of your model. Add the investment to water and mix until smooth (think pancakes). Place the investment mixture in a vacuum chamber for about 30 seconds, then pour it carefully into your flask. Let it dry overnight.
- Wax Burnout: Place your flask in the kiln to remove the wax and prepare your flask for casting. Timing and temperature will be adjusted according to the size of your flask. Then, gear up! Put on your safety glasses and gloves before handling your hot flask.
- Casting: Lock the centrifuge, place your flask in the cradle, and push the crucible up against the flask. Preheat the crucible, then pour your pre-weighed metal into it. Using an oxy-acetylene torch, melt the metals in your crucible and occasionally stir with a stirring rod. When the metals are completely melted, unlock the centrifuge, activating it, and flooding the molten metal into your flask. The centrifuge will spin for about one minute. Remove your flask from the cradle using tongs (it’s hot!).
- Quench: After your flask cools and is no longer glowing red, pick up your flask with a pair of tongs and completely submerge it in the quenching bucket until the bubbling stops. Try to keep your flask horizontal so your casting does not slip out and fall to the bottom of the bucket. Scrape the soft investment out of the flask and extract your casting.
- Finishing Work: Cut off the sprues, grind down any sharp edges, sand, and polish your piece, and enjoy!
What is the best resin 3D printer?
LCD resin 3D printers are the best. They possess a fast processing time, are inexpensive and are notable for the smooth and efficient 3D modelling process they provide. LCD 3D printers come in different variants and are suitable for carrying out multiple task. It’s advisable you explore an LCD 3D printer buying guide before equipping your printing line with any model.
How do you make silver casting jewelry?
Melting silver is an easy process once you get to know the fundamental principles of the metal’s melting points. Commonly used by many jewellers due to its lower melting point, silver is a great place to start when learning how to melt metal to make more complex jewellery designs, and graduate to more difficult soldering techniques. It’s important to make yourself aware of the melting point of silver before you start working with it so that you use the right soldering equipment for the job. The best place to start is getting to know the melting point of silver…
How do 3D printers work?
A 3D printer essentially works by extruding molten plastic through a tiny nozzle that it moves around precisely under computer control. It prints one layer, waits for it to dry, and then prints the next layer on top. Note that the plastic from which models are printed is hugely important.
What is castable resin?
Castable resins are photopolymers designed to be functional equivalents of wax. Heated to temperatures reaching well over 750°C, they burn out, leaving ash residue not exceeding 0.003% of the pattern’s mass.
How difficult is it to learn 3D printing?
It’s not difficult to learn, just an overwhelming number of things that you’d need to learn. And most importantly of all, you need to learn how to maintain a device with several moving parts. This is mostly just a lot of practice and when you first start 3D printing, it’s likely that your first prints will fail
Is LCD faster than DLP?
While LCD projectors have a sharper image and superior picture quality, DLP projectors are lighter, portable, and considered to be more reliable. DLP (Digital Light Processing) technology uses micro-mirrors to project images from a monitor onto a large screen.
How do you make wax Jewelry mold?
- Make a Plaster mixture: Use two parts plaster powder to one-part water. Most plaster packaging instructions say to mix water into plaster. On the contrary introducing plaster powder to water will minimize the amount of bubbles. So start with water and gradually add plaster. Note- plaster powder shrinks as it soaks, you’ll use a lot more then you think so be supplied with a big bag before you start.
- Stir: You can use a stir stick of some kind but I use my hands to be able to brake up all the lumps fast before the mixture starts to set. Be thorough and add a little more water or plaster until it’s smooth and the consistency of pancake batter. If there are bubbles you can tap the bucket lightly on the work surface and watch them raise to the surface and pop.
- Imbed wax sculpture: Gently and slowly insert your wax piece into the plaster mixture. Sculpture down, sprues up. Sprues should remain visible on the top surface. Your piece should not reach the bottom or any walls of the container. Hold your piece hovering in position until you feel it’s being supported by the surrounding plaster.
- Allow time to set: Allow the plaster to set completely, the longer the better.
- Pop the Mold out of the Container: For one piece I used a plastic container. For the other which didn’t fit into a plastic container I improvised with aluminum foil. Remove whatever you used as a holding vessel and get to the bare plaster mold. Bake the Mold: Even though the plaster mold appears to be dry, there is moisture trapped in it. In order to dry it out and pre-heat it before melting the wax out use a conventional oven and very slowly increase the temperature. Heat shocking it will cause the mold to crack so be patient. Follow my next instructable on burning the wax out of the plaster mold for lost wax casting for further instruction. Have Fun!
What is wax printer?
Wax printers are currently the only group of printers that adopt this style of machine is the Xerox ColorQube range. Sold in/wax printers are exactly as you would imagine them to be. Unlike fluid ink cartridges, wax printers run of solid ink sticks. In order to print, the ink melts and transfers onto the paper.
How much does 3D printer resin cost?
The average 3D printer material cost for standard SLA resins is approximately $50 per liter. That means entry-level, cheap resins may even be under $50. But as with prices for other types of 3D printing materials, it highly depends on the quality of the material, the type of the material and the manufacturer.
What is printer and plotter?
A plotter is the category of printer that takes commands from the computer and then makes drawings on the paper with the help of various pens. It is used for producing hard copies of large graphs and designs on paper like construction maps, engineering drawings, architectural plans and business charts. On the other hand, a printer is an external hardware output device whose work is to acquire the text and graphics output from the computer and generate a hard copy of it. So, basically it processes the soft copy and produces its hard copy.
Which resins are used in the jewelry industry?
Based on your jewelry 3D printing requirements, you can use different types of resins, such as high hardness resin, castable resin, ABS resin, high-temperature press film resin. Our 3D printers support all these resins.
How do 3D printers make jewelry?
With the digital workflow, jewellers use CAD software tools to create the designs digitally and a high-resolution 3D printer to produce the 3D printed patterns that can then be cast in the mold. After burnout of the positive pattern, the process follows the same path as traditional investment casting.


